|
In SoldEazy, you can create datasheets one by one on the user interface or you can utilize a spreadsheet to list items faster.
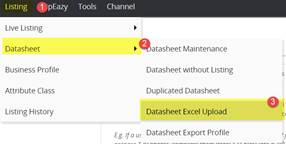
I. Go to Sell> Datasheet > Datasheet Excel Upload
II. Download the excel samples
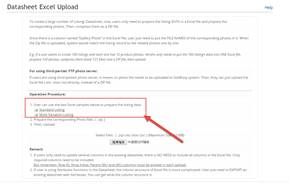
III. Fill out the spreadsheet according to the sample listing:
IV. The content of multiple-choice publication should be filled in according to the first point of this tutorial.

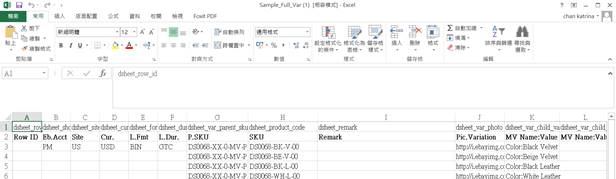
Field A (Row ID) : If you want to modify a data table, fill in the data table number in this field. If you want to add a new data table, leave it blank.
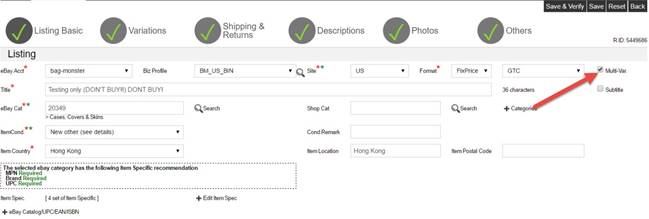
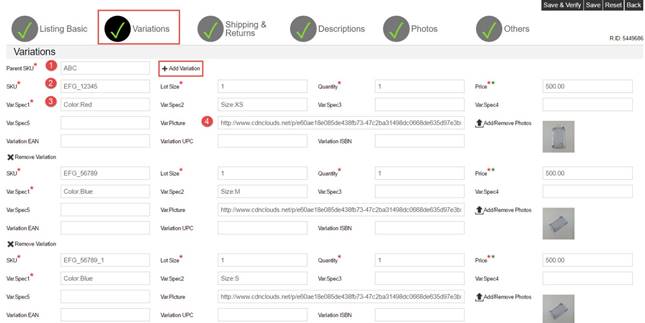
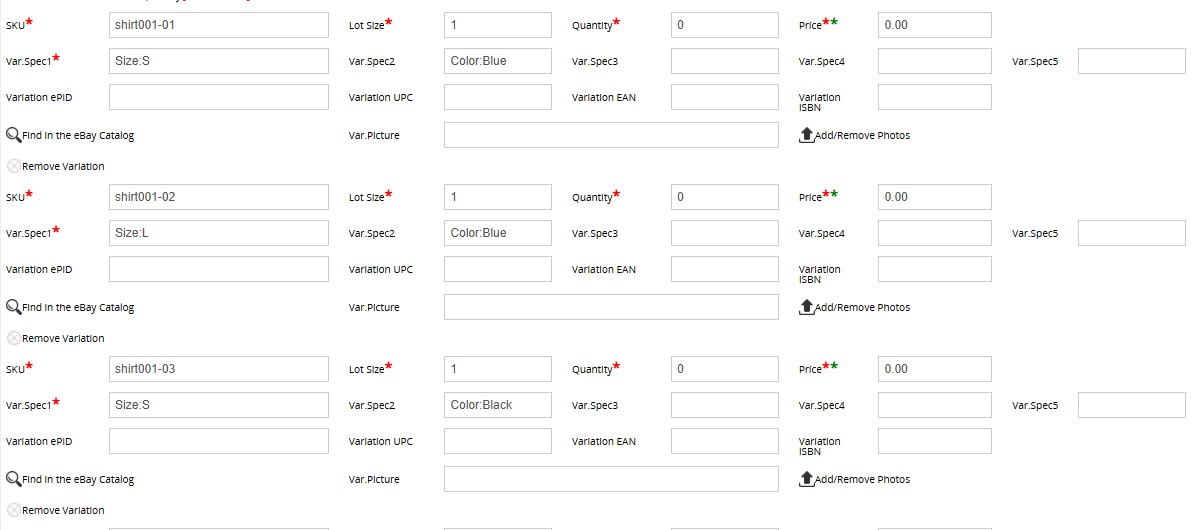
Column G ( P.SKU): Multi - Variation . This item cannot be the same as any other SKU . It is a multi-variation listing. The P.SKU must be the same (as shown above) .
Column J ( Pic Variation ) : Multiple options for pictures. Each product needs to upload its own photo product.
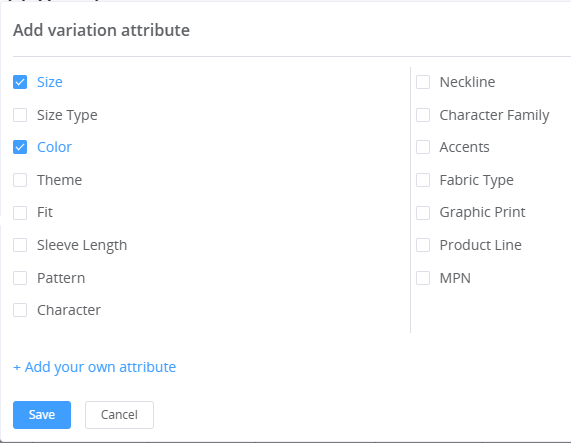
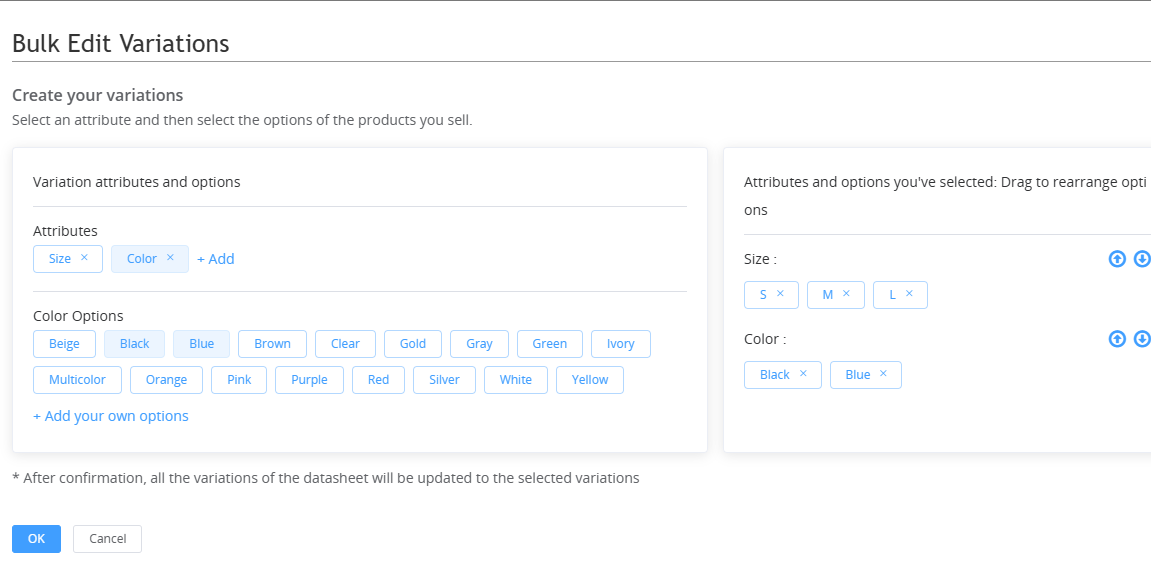
Field K ( MV Name: Value Pair 1 ) : Var Spec 1 in the system . If there is more than one option column , please add the corresponding Var Spec 2, Var Spec 3, etc. in MV Name: Value Pair 2.

When setting options in the posting, the format must be XX : YY
XX represents the category of the option, and YY represents the option, such as Colour: Red

For example : First option- SKU Var spec1 à Colour: Red
Second option -SKU Var spec1 à Colour: Blue
If there is more than one variation type (e.g. Color and String ), fill in Var Spec 1 and Var Spec 2 respectively .
For example : First option- SKU Var spec1 à Colour: Red
First option -SKU Var spec2 à Strand : Single-sided
Second option -SKU Var spec1 à Colour:Blue
Second option-SKU Var spec2 à String: Single-sided
* The Var Spec. of a product cannot be exactly the same as the Var Spec. of another product .
Column P ( Lot ): Number of lots per item - how many items will a customer get when placing an order or purchasing once?
Each SKU needs to be filled in separately
Field Q ( QTY ): Quantity - the quantity allowed to be sold. Each SKU needs to be filled in separately.
Field R (price): The price of each SKU. Each SKU needs to be filled in separately.
Field DB (EOP): Field for system to identify the end of data

(You may refer to SoldEazy Tutorial-Datasheet column-V1 for the explanation of different columns)
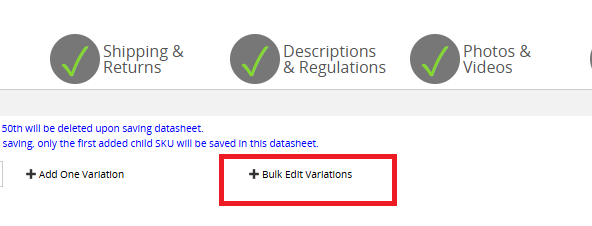
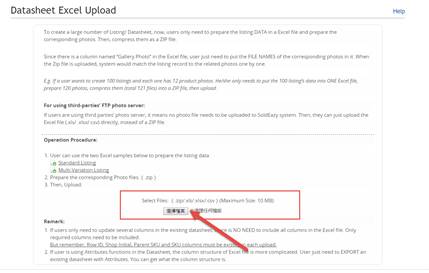
IV. You can upload product photos to the listings. (Please refer to Soldeazy Manual_Bulk Export & Export Profile for more details)
V. Upload the excel or zip folder to the system:
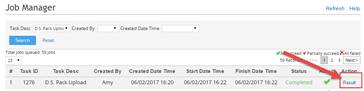
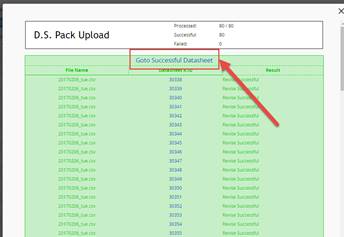
I. Wait until the upload job is added to < Job Manager >. You may go to < Job Manager > to see the result. When the job is done, click < Result > and < Go to Successful Datasheet > to process to the next step.
|