


Storeazy – How to establish a web store in 15 minutes? (BigCommerce manual)
Storeazy – How to establish a web store in 15 minutes?
SoldEazy, cooperating with a Web Store system Bigcommerce, enables you to build brands and scale your business faster by establishing online stores. Storeazy can be used to manage all the listings in your stores.
1. How to create a Bicommerce account?
2. How to link up your Bigcommerce account with Storeazy?
3. How to manage currencies in your store?
4. How to clone eBay listings to your store in bulk?
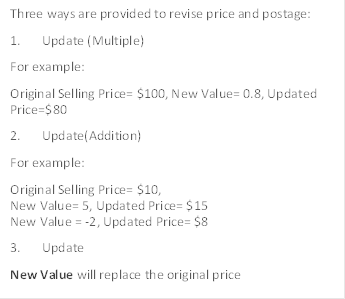
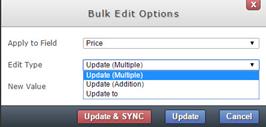
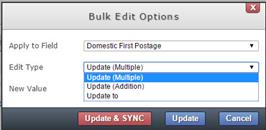
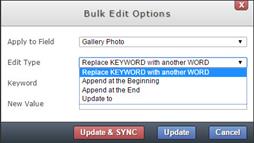
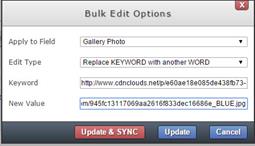
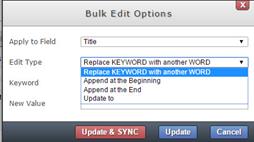
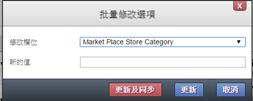
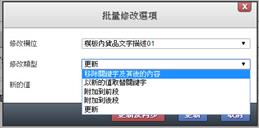
5. How to revise listings in bulk?
6. How to connect a payment gateway?
7. How to edit your store with theme editor?
8. How to point your nameserver to Bigcommerce?
|
1. How to create a Bicommerce account? |
||
|
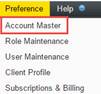
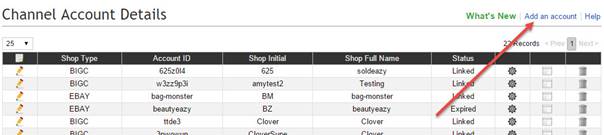
I. After logging in SoldEazy, go to Home > Preference > Account Master. Click the <Add an account> button.
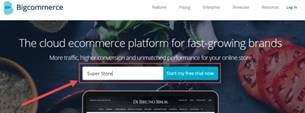
II. Choose <Bigcommerce> as the account channel type. You will then be directed to Bigcommerce.
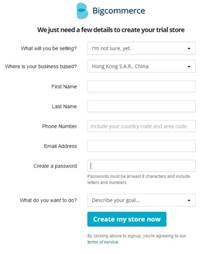
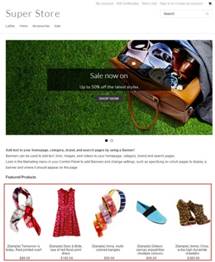
III. Input your webstore name, e.g. Super Store. The site of your store would be “superstore.mybigcommerce.com” temporarily. You may point your domain name to the store subsequently.
IV. Fill out your store and personal details.
|
||
|
2. How to link up your Bigcommerce account with Storeazy? |
||
|
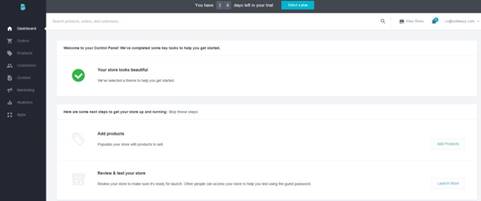
I. Log in Bigcommerce. Click <Launch> in the home page to publish your webstore
II. Click the button on the top right corner
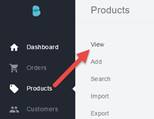
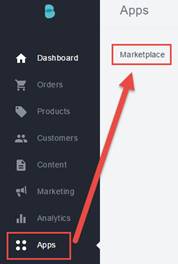
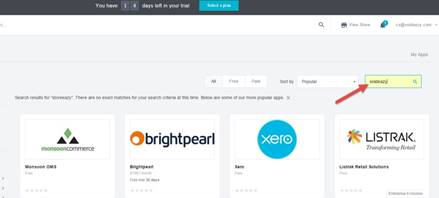
III. Go to ProductàView. Check and clear the list of sample products. I. Go back to the Bigcommerce control panel. To install Storeazy, search “SoldEazy” in Appà Marketplace.
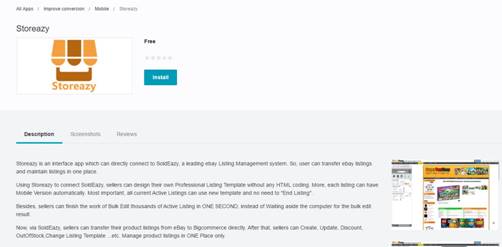
II. Click on Storeazy app and click<Install> on the pop-up page.
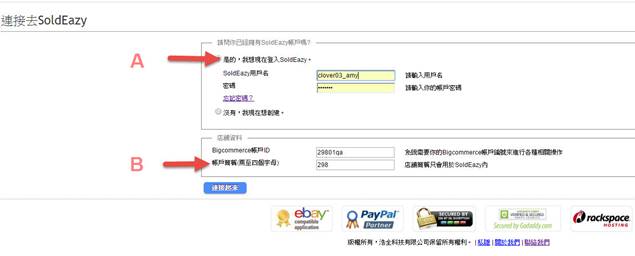
III. To complete the installation and link-up process, you may sign in SoldEazy and create your store initial.
A:Enter your SoldEazy user name and password B:System has automatically filled up your Bigcommerce account ID, which is not amendable but you are allowed to modify the account initials. For example, the initial of your eBay store is “ABC” and the initial of your Bigcommerce store can be “bcABC” for easy recognition and management. IV. When you are directed to SoldEazy homepage, your Bigcommerce account is linked up with SoldEazy successfully. You may continue the daily operation in this page or in a new window.
|
||
|
3. How to manage currencies in your store? |
||
|
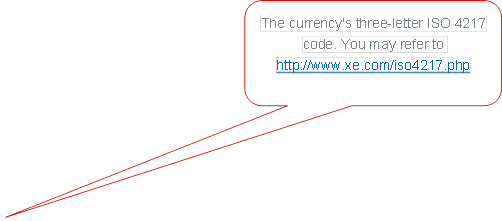
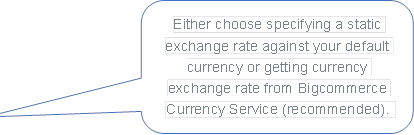
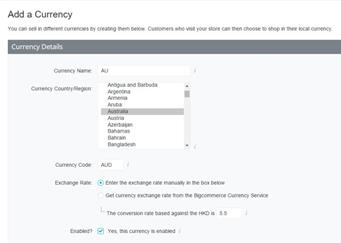
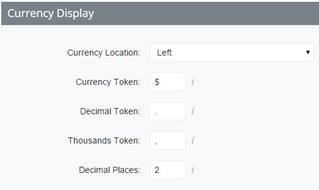
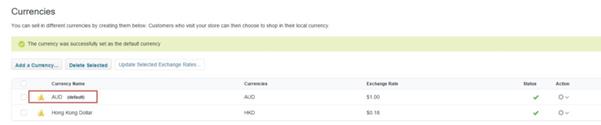
In Bigcommerce, you may establish various currencies to use in the store. If more than one currency is enabled, your customers are allowed to choose among the currencies that you have set up in a currency converter. System will default a currency according to the location that you chose when you created the account. For example, If you selected “Hong Kong” for the question <Where is your business based?>, Hong Kong dollar will appear in the list of currencies in the store. If you wish the store support other currencies, click the <Add Currency> button.
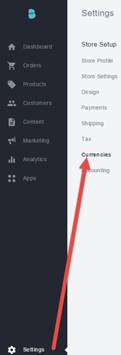
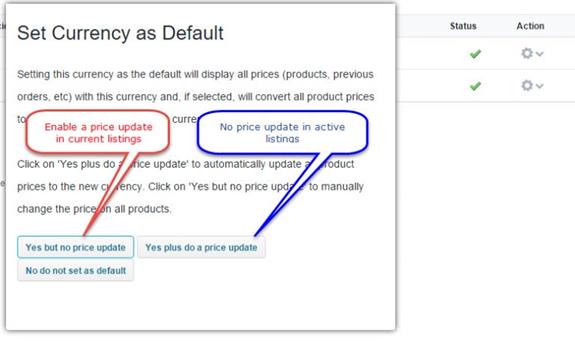
Note: Only one type of currency can be used as the default currency. Default currency is not only the currency that displays in the store, but also the currency in all transactions and invoices. For example, you cloned multiple listings with selling prices of AUD 20 to a store with GBP as the default currency. You will find the prices of this batch of cloned listings become GBP 20 after the duplication. I. Go to Setting à Currencies II. III. IV. V. Return to the control panal and click
VI. AUD is now the default currency.
VII. Repeat steps II to IV to add more currencies to the list of supported currencies.
|
||
|
4. How to clone eBay listings to your store in bulk? |
||
|
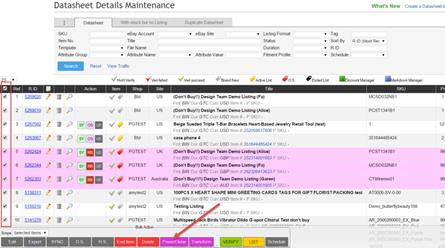
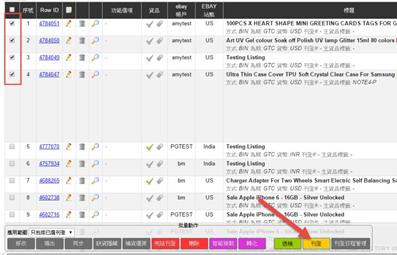
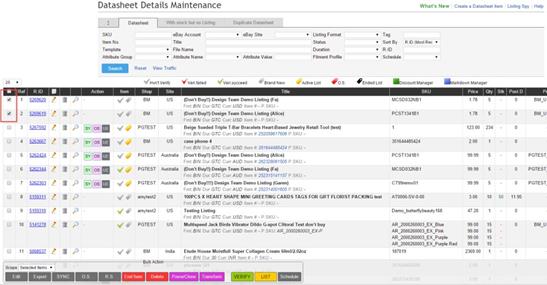
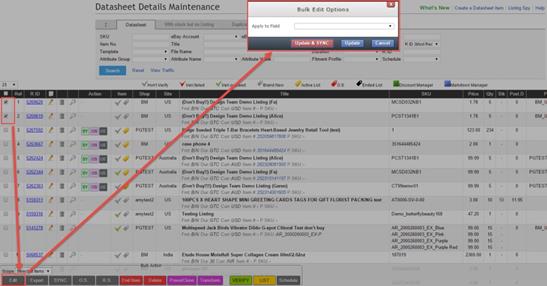
I. Go to Datasheet Maintenance. Check the required listings and click the <Powerclone> button at the bottom of the page. II. Click the <Powerclone>button. You may edit different listing information in the popp-up window.
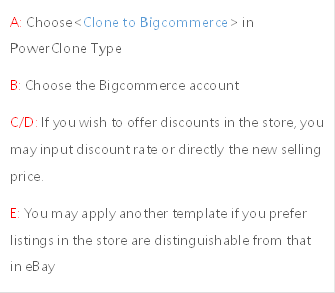
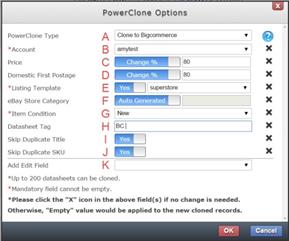
G: Pick the appropriate item condition F: If you adopt eBay store category, you may simply apply < Auto Generate>. Otherwise, please input a new store category. H: Add a datasheet tag to the listings for easy management. I/J: Enable to avoid duplicate listings in the store. (Recommend) K: You may add more fields in the process of powerclone. Click <OK> if you finished setting. Note: The cloned listings are not listed to the store after the duplication to allow a final check before listing. III. Select the cloned listings and list them in bulk after final checking.
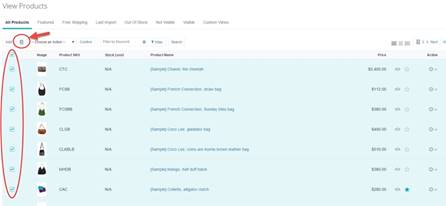
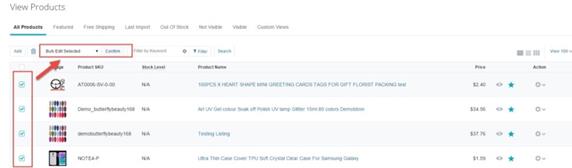
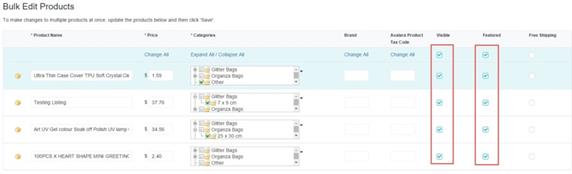
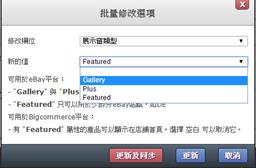
IV. In Bigcommercec control panel, go to View Products. Check the new listings and click the <Bulk Edit> button.
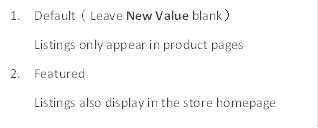
V. Check <Visible> and <Featured>
VI.
|
||
|
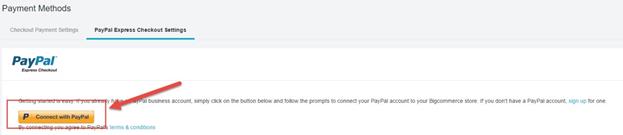
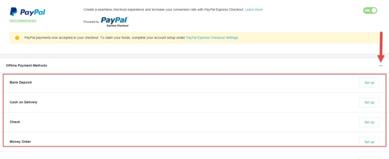
6. How to connect a payment gateway? |
||
|
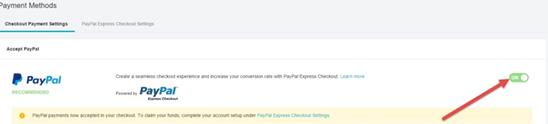
I.
II. You can also choose other payment gateways to accept credit card payments online. There is no limit to how many payment methods you can set up, but we suggest not using more than two or three.
|
||
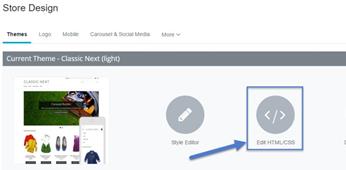
7. How to design your store? |
||
|
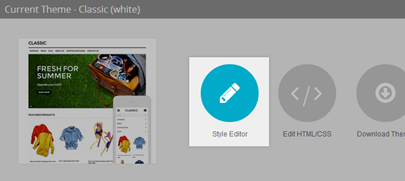
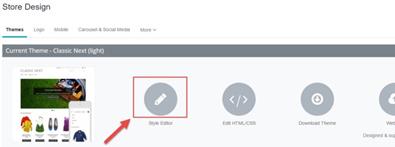
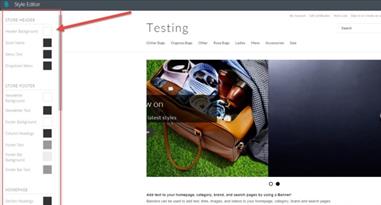
I. II. <Style Editor> allows you to edit the colors and fonts of your store without any knowledge of HTML and CSS. III. To change a color, click on the color swatch beside the field that you wish to edit. Note: The field that is not found in the style editor should be edited through the theme’s template files. IV. V. You may also create a unique store template with HTML and CSS.
|
||
8. How to point your nameserver to Bigcommerce? |
||
|
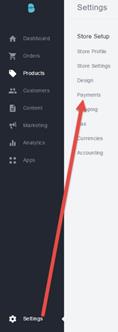
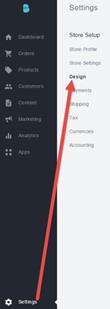
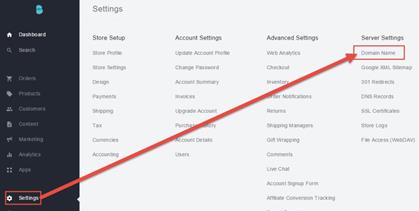
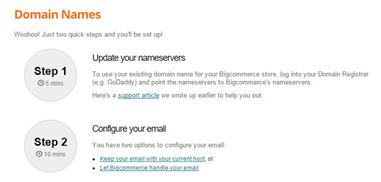
Supposed that you have already registered a domain for your store. I. Go to Setting à Domain Name
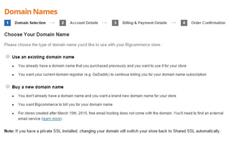
II. Click the <Use an existing domain name> button.
III. Input an available domain name. Click the <Use Domain> button.
IV. According to the steps, go to your Domain Registrar to update your nameserver.
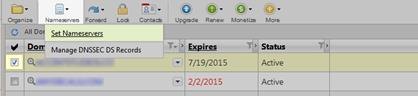
i. Take GoDaddy as an example. a. Sign in your GoDaddy account. b. Click the <Launch>button beside DOMAINS.
c. Check the box on the left of the domain that you want to use for your store. d. Hover over <Nameservers> in the main menu. Select <Set Nameservers>.
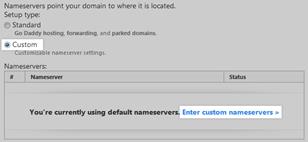
e. Choose <Custom>. Click the <Enter custom nameservers> link.
f. Enter the following in the Nameserver fields. Click <Add Nameserver>if you need more fields.
g. Click <OK>, then <Save> h. New server changes will be effective within 72 hours
|


** End **
